

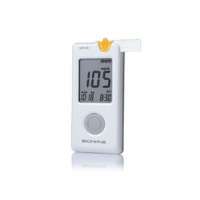
The Rightest Blood Glucose Monitoring System GM100 Slim Series is intended for in vitro diagnostic use (for self-testing & professional use) only (outside the body). The device is calibrated for test with fresh capillary whole blood samples from the fingertip, palm or forearm depends on what kind of lancing device you are using.
Measurement TechnologyOxidase Electrochemical Sensor
SampleCapillary whole blood
Minimum Sample Volume1.4 µL
Measuring Range10~600 mg/dL (0.6~33.3 mmol/L)
Test Time8 seconds
Memory Capacity150 blood glucose test results with data and time
Power SavingTum off automatically after 2 minutes no use. Or press the button for 2 seconds.
Operating Temperature10~40? (50~104?)
Operating Relative Humidity10~90%
Hematocrit30~55%
Power SupplyOne CR2032 battery
Battery LifeAbout 1,000 tests
Meter Dimension95.0x43.8x13.0 mm
Meter Weight43.0 g with batteries
MonitorLCD display
Display Area39.0x38.0 mm
Meter Storage Conditions-10~60? (14~140?)
Test Strip Storage Conditions4~30? (39~86?),<90% relative humidity
Q1. How can I do if it cannot be switched on or doesn’t function?
1. Open the battery cover and taking off the batteries, press the main button for over 10 seconds, then put on new batteries to check if the meter can function.
2. Please switch on the meter after reloading new batteries, the type of battery for GM100 is one CR2032 coin cell batteries.
3. If the meter still doesn’t function, please contact with local distributor for further help.
Q2. How can I do if it keeps doing self-test running, and can’t switch to time setting mode when pressing the main button?
Please switch on the meter after reloading new batteries, the type of battery for GM100 is one CR2032 coin cell batteries.
Q3. What Er1 message means and how can I do?
1. The strip has been used or exposed to the air too long, please open a new strip vial and start a new test.
2. Please discard used strips, not put back into vial to prevent other un-used strips from contaminating.
Q4. How can I do if the meter showing ER2?
1. Open the battery cover and taking off the batteries, press the main button for over 10 seconds, then put on new batteries to check if the meter can function.
2. Please switch on the meter after reloading new batteries, the type of battery for GM100 is one CR2032 coin cell batteries.
3. If the meter still doesn’t function, please contact with local distributor for further help.
Q5. How can I do if the meter showing ER3?
When the meter starting to measure the blood glucose, the strips are moved or taking out, the screen shows Er3 due to signal disconnected.
Q6. How do I set up the time of the meter?
1. Open the battery cover and taking off the batteries, press the main button for over 10 seconds, then put on batteries.
2. Press the main button when meter is self-test running to switch to time setting mode.
3. Press main button for setting year, press one time to confirm, then press the main button for 2 seconds to switch to date, press one time to confirm; do the same step for time and unit setting.
4. If you would like to skip the time and unit setting mode, press the main button for 5 seconds, the meter will switch to testing mode with date and time.
Q7. How do I do if the testing result is inaccurate?
1. The test strip may absorb too much humidity due to expose to the air too long, which will cause the deterioration of test strip quality. Please close the strip vial immediately after taking out the test strip, and finish the test within 3 minutes to avoid test strip expose to the air for a long time.
2. If the testing results of the strips in the same vial are different, please do the quality control test.
3. Check if the “smart code key” were contaminated or has been contaminated, or the electrode is damaged, if yes, please contact with local distributor for further help.
Q8. How can I do if the result of the quality control test does not fall within the range on the strip vial?
1. When doing control test, after inserting a new strip, please press the main button for 5 seconds and the screen shows “CS” to enter control test mode; then dripping CS to do the test.
2. To prevent the quality of CS from being deteriorated, please close the cap immediately to avoid CS of exposing to the air.
3. When doing the control test, please drop the control solution (CS) on the cap of the CS and drip from it, close the cap immediately after test; Please not drip control solution to the test strip directly to keep the quality of CS.
4. To prevent the quality of CS from being deteriorated, please close the cap immediately to avoid CS of exposing to the air.
5. If the test result were still inaccurate, please start a new test with a new open strip; if the problem can’t be solved, please contact with local distributor for further help.